In this tutorial we will describe how to realize and mount the disc brakes for our cargo bike, both on the rear dropouts and on the front fork (if needed).
Even if the disc brakes are a newcomer in the bike industry, there are already several standards available. One of the first standards to be adopted was IS, acronym for International Standard. In this standard the disc caliper is attached to the frame/fork with two bolts that are 51mm apart (center to center). The bolts aim at the wheel.
Geometry of IS mount
For the rear caliper, the two mounting eyelets are positioned on two circumferences with radius 78.1mm and 39.9mm. The circumferences are centered on the wheel axel.
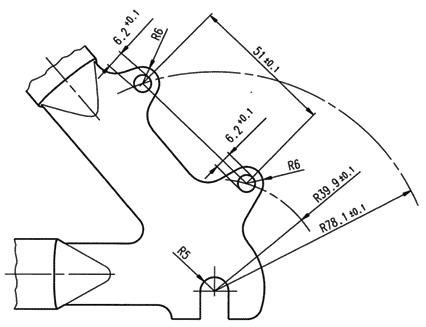
For the front caliper the eyelets are instead positioned on two circumferences of radius 49.7 mm e 87.3 mm.
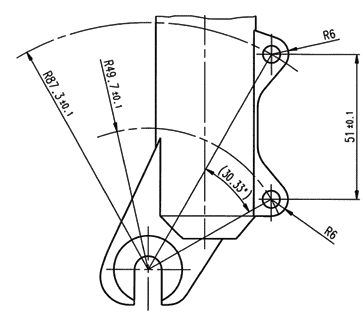
Welding jig
The jig that we designed to position the eyelets in the correct way is based on those contraints. It is positioned on the dropout and has two mounting holes at the correct distance from the wheel axel. With the help of the holes, it is possible to screw the brake support on the jig.
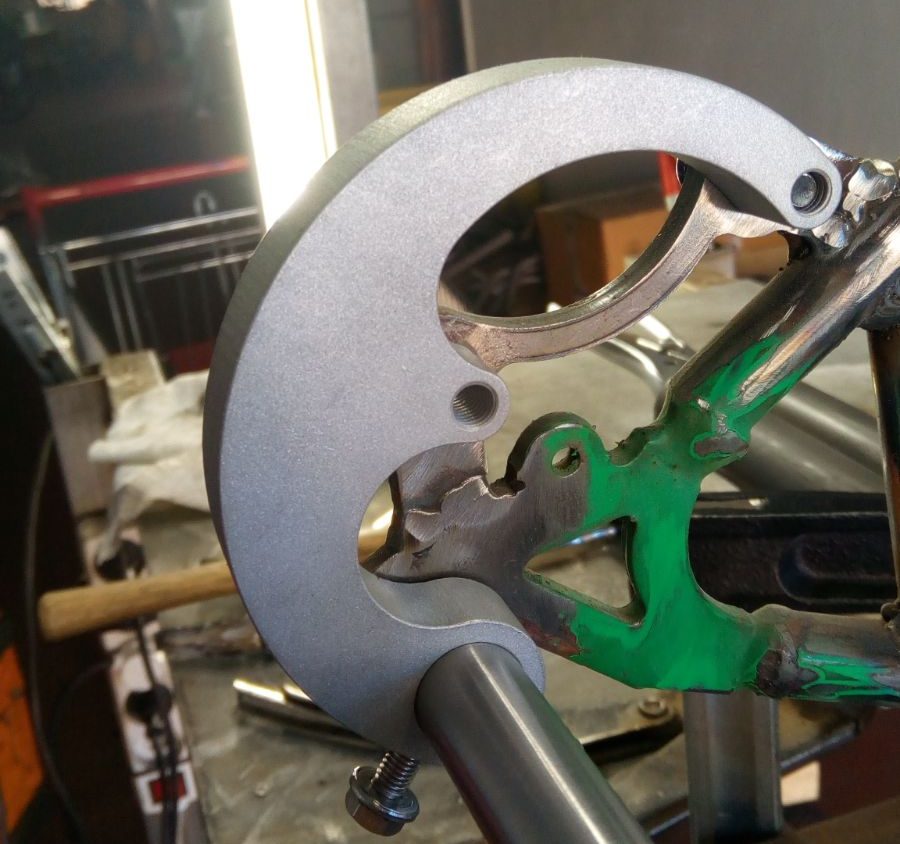
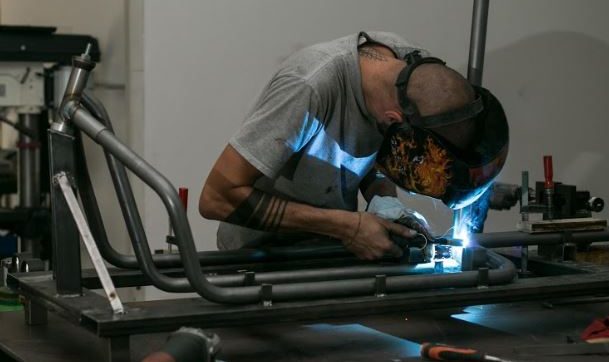
To realize the caliper support we decided to use a laser cutting machine, but they can also be realized in a more “artisanal” way with a 4-5 mm stainless steel plate.
In this short tutorial we have described the details of the IS supporting plate for the disc brakes. It is a relatively quick operation, but some accuracy is requested to obtain the correct braking performances. In our opinion, the disc brakes are essential on a cargo bike, to get the right safety level especially when carrying heavy loads or kids. That’s why all our bikes come with this kind of brakes.
On the next (and final) tutorial we will see more in detail the realization of the steering rod and the center-stand for our cargo bike.