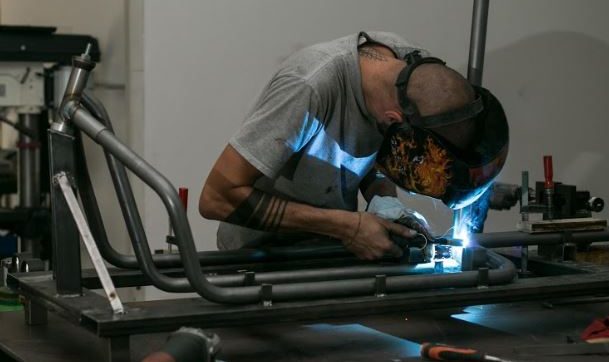
The next phase of our project is welding our cargo bike. It is a fundamental part, and we need to put special care while doing it since it can really affect the final quality of the cargo bike frame.
The main difficulties are two:
- The technique by itself requires a lot of experience and good manual skills. Moreover it’s important to know very well the welding machine to obtain the proper adjustments. There are several YouTube channels that go deep in this technique, and are quite useful.
- Keep in a steady place the parts while welding.
While to acquire the technique the only way is to practice a lot with patience and dedication, to keep the parts in place we can use a special tool called welding jig.
Cargo Bike Welding Jig
A jig is a set of constraints and clamps, positioned according to the drawing, where the tubes are layed down and blocked. You can see that our jig has several constraints on the main angles of the frame: horizontal, first and second bend of the loading bed, head tube. This allows to compesate for the bending tolerances, so that we are sure that once the clamps are closed all the angles of the frame are exactly as we want. In the following picture you can see our first welding jig, which we used in the beginning of our cargo bike journey to build the Bronte.
Once the tubes are positioned, we need to verify the joints to be sure that all the tubes fits nicely. Once we are 100% sure we can proceed to welding, firstly just in few spots to fix the positions and then all the frame:
Welding the rear triangle
A this point we just need to weld the MTB frame that we have previously prepared. Before doing that we need to decide the value for the rear drop, which is the vertical distance between the bottom bracket and the rear axel. A high drop will lower the bike centre of gravity making it more stable, with the risk of touching the ground with the pedal during a turn.
A rule of thumb for a good drop on a 26″ frame can be obtained by:
- D = 230mm – crank_length.
Therefore, considering a standard crank length of 170-175 mm, the resulting drop value is around 55-60 mm. A simple jig for the rear drop is showed in the picture:
Tube Notching
To notch the horizontal tube of the MTB frame, since it has already been cut as close as possible to the head tube, we just need to stay with the hole saw as close as possible to the edge.
At this point we can put back the frame on the drop jig and measure the horizontal distance between the cargo rear head tube and the MTB horizontal notched tube.
Subtract from this measure half of the diameter of the MTB bottom bracket and shorten the two cargo lower tubes by this value. In our case we shortened the two tubes by 70 mm, since we had 90 mm of distance and a bottom braket with 40 mm of external diameter. We can now notch the two lower tubes, positioning the saw axel exactly on the cutting plane. This will result in a simmetrical notching.
Time for the welding of our cargo bike! First thing we need to attach the MTB frame to the front loading bed. To maintain the alignement between the two we can once again take advantage of the rear drop jig.

Our frame looks almost ready now:
In the next tutorial we will see how to mount the supports for the disc brakes, stay tuned!