In this second tutorial we will describe the geometry of the cargo bike and the steps to realize the front deck. This is a very important part, the one that will be joined to the MTB frame to form the complete structure of our cargo bike frame. For the Bronte frame we have chosen stainless steel tubes ST37-3 with a constant thickness of 1.5mm. With these tubes it’s possible to obtain a really good stiffness of the frame while keeping the weight low. For the head tubes, the choice is connected to the headset that will be used. We have opted for a 1″ 1/8 threadless headset, EC34, which requires a tube with an internal diameter of 34mm. Our selection is Dedacciai 34×1.
Before discussing the practical realization, it’s important to focus on some design aspects. If you want to know more about the design principles of our cargo bike you can check our workshop page.
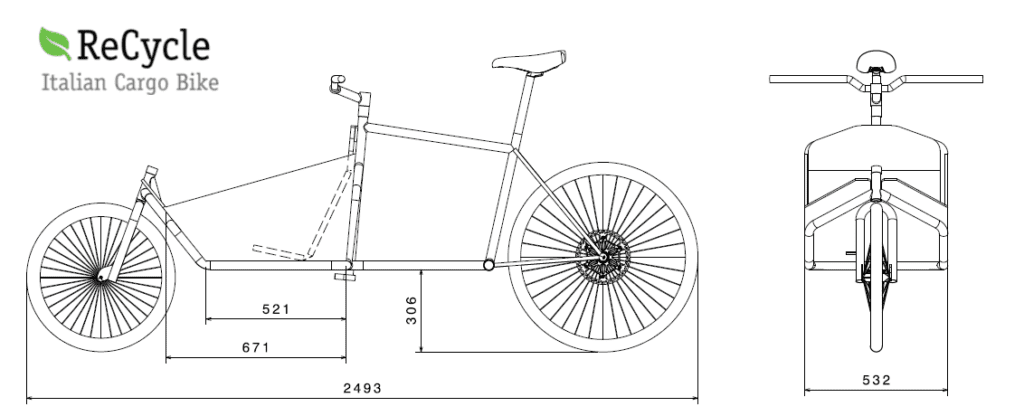
Length of the loading bed
The length of the loading bed depends mainly on the needs of the final user. A long surface will offer more loading capacity, at the cost of a heavier and less agile bike. Viceversa a short surface will result in a more responsive bike (especially in some situations like u-turns). We have chosen a short length of 520 mm, suitable for carrying kids and an average amount of goods. This feature is especially good on the narrow italian cycling paths, where zig-zag between obstacles is a never-ending story.
Width of the loading bed
Generally this value is kept lower than the length of the handlebar (max 600mm). In this way is simpler for the driver to understand where is possible to pass through and where not. We have therefore chosen a value of 530 mm, realized using three equally spaced tubes.
Front steering angles
The fundamental parameter of interest is the fork trail. Generally, the trail varies between 50 mm to 63 mm. A high trail value will result in a stabler bike at high speed, less agile at lower speed. We have chosen an intermediate value of 57 mm. At this point knowing the fork rake and the front wheel diameter (20″), it’s possible to decide the head angle to obtain the desired trail.
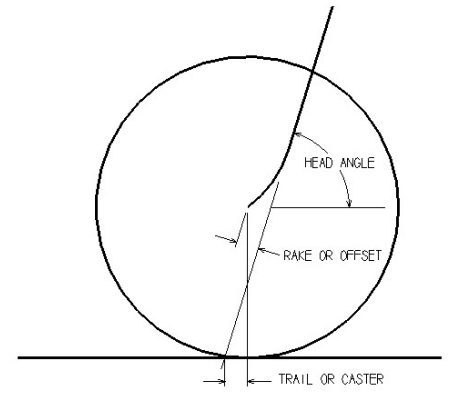
For the trail calculation you can either use a 2D CAD (many freeware available) or an online calculator like Bycicle Trail Calculator.
We have now the final geometry of our cargo bike:
Tubes preparation
The best way of preparing the tubes is by using a CNC bending machine. This allows to save a lot of welding and to obtain a very high accuracy on the angles and on the geometry. The extremity of the tubes that will be welded to the MTB bottom bracket are deliberately long, so that it will be possible to cut them accordingly to the size of the MTB frame.
Here is how the bent tubes appear, ready for the following steps:
The last operation to be done is notching the tubes. This is most commonly done with a rotary hole saw in which a hole saw of the diameter of the tube being attached to is fed into the stock to be notched at a certain angle. The value of the cutting angle is again to be retrieved from the CAD.
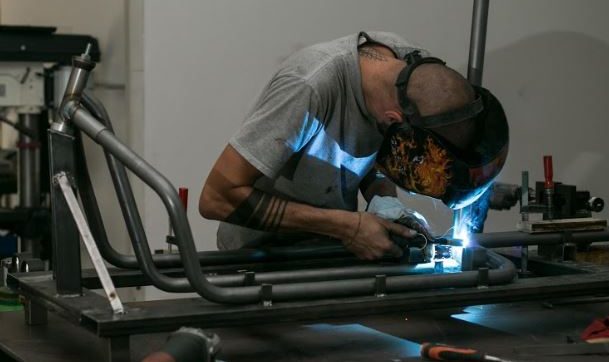
Once all the notching is done, our tubes are ready to be placed on the welding jig. On the next tutorials we will see more in detail the jig charateristics and the welding operations.